Free Canadian Nail Vinyls from Nail Polish Canada

canadian nails from nail polish canada

Hello friends!! It’s been awhile! If you haven’t heard, I recently bought a house! So I’ve been 24/7 house-ing. I have photos and posts planned and ready, I just need to get writing!

Anyways, I have a fun post today! We’re about half-way through June which means only half a month more till Canada Day! Even with all of the *cough* politics out there, there’s no better time to celebrate being Canadian! I’ve partnered up with Nail Polish Canada to give 10 readers FREE nail stencils to show your Canadian pride. These are completely free including shipping!

Continue Reading

#NailsOfTheDay: Essie Gel Couture

Essie Gel Couture

I haven’t done my nails in forever and the long weekend was a great excuse to give my nails a little TLC. I was sent some of the Essie Gel Couture polishes to review and wanted to really test the claims of longwear gel without a lamp. I find a lot of brands are pumping out these types of products, but Essie being one of my holy grail brands, I had high expectations.

Continue Reading

#NailsOfTheDay: Easy Crescent Moon Nails

This #NailsOfTheDay is a bit of a throwback. I honestly really don’t do many nail looks much anymore, just because of timing. One of my highschool nail art favs is the crescent moon – reverse french tips. It’s super easy and I think it looks really nice. Here is a mini tutorial of how you can get the look too.

Continue Reading

#NailsOfTheDay: Essence Flower Power

essence nail art

Hello friends! For my final post for Essence week, I have a nail art design with some of the new shades for Spring Summer 2017. For this nail art design I used the Essence Nail Art Duo Stylist dotting tool which I’ve actually had for some time. It’s super easy to create cute little designs, especially flowers!

Continue Reading

#NailsOfTheDay: First Experience with Gel Nail Polish

*Purchased

This post has been a long time coming, but I’m finally getting to it! I wanted to chat about my first experience with gel. If you checked out my IMATS post, you’ll know that I got my first gel manicure from Bio Seaweed Gel that had a little booth there. I put this manicure through the wringer, and I definitely have my opinions about gel now.


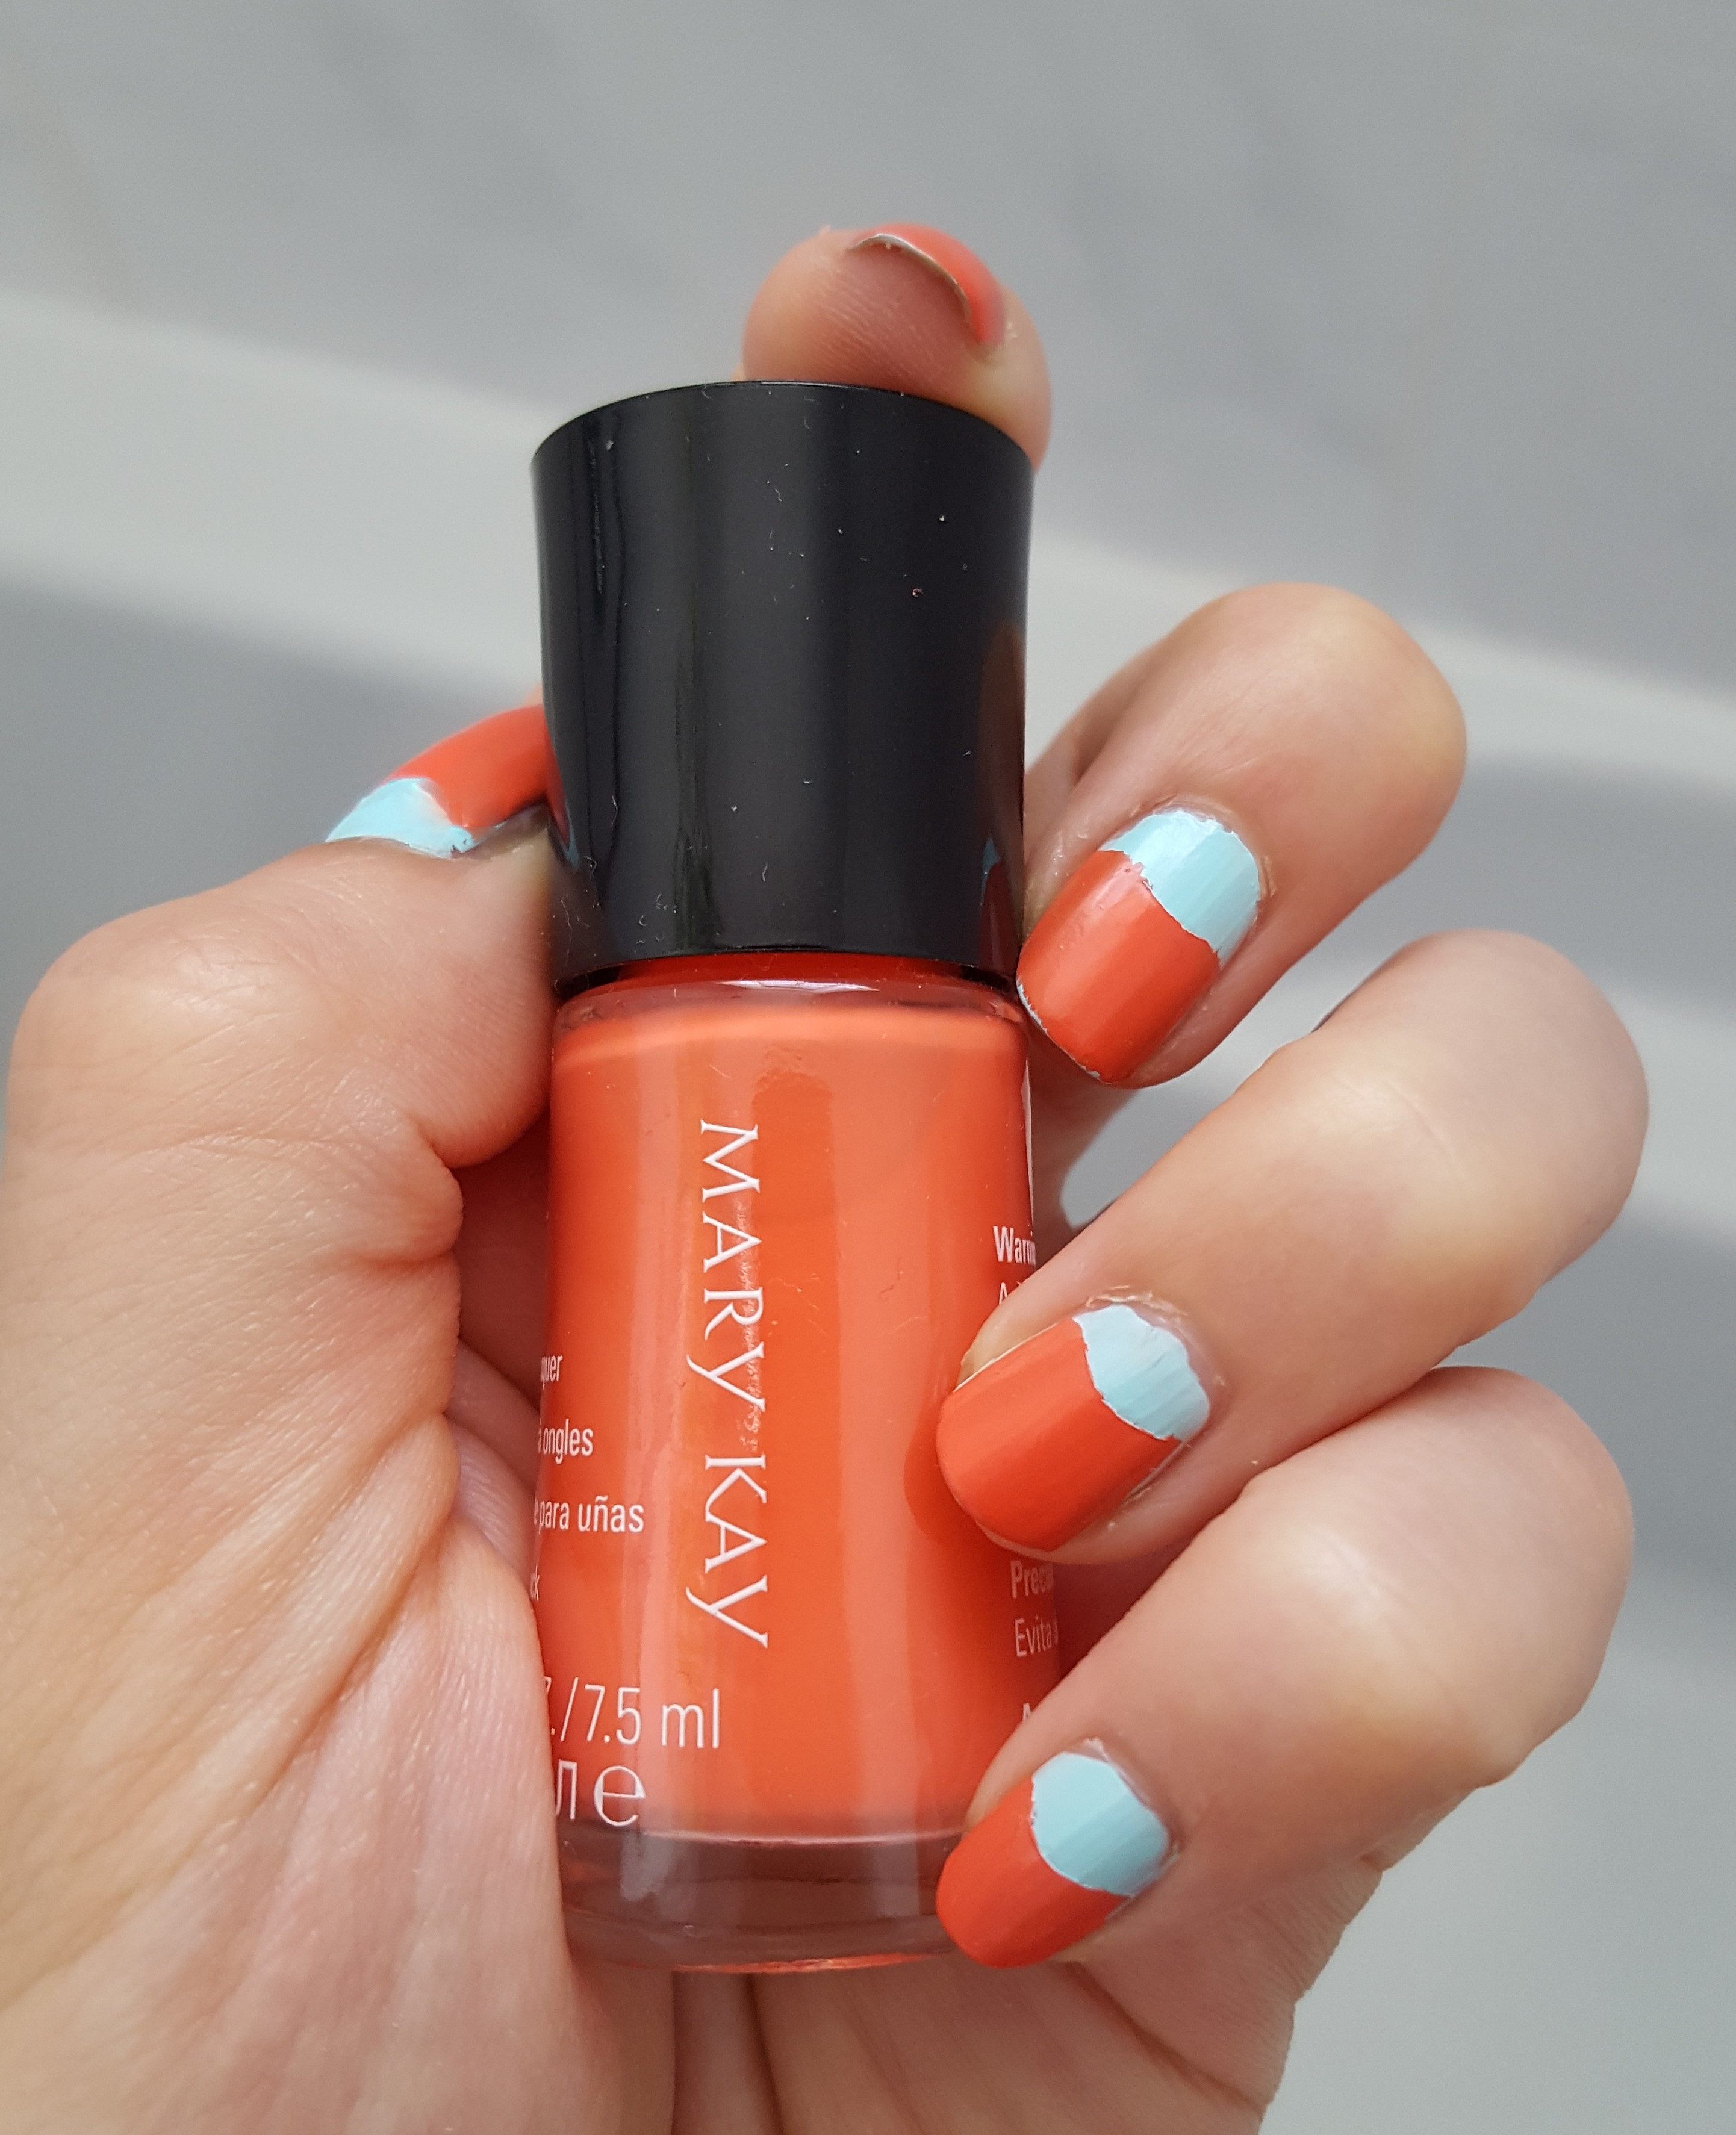
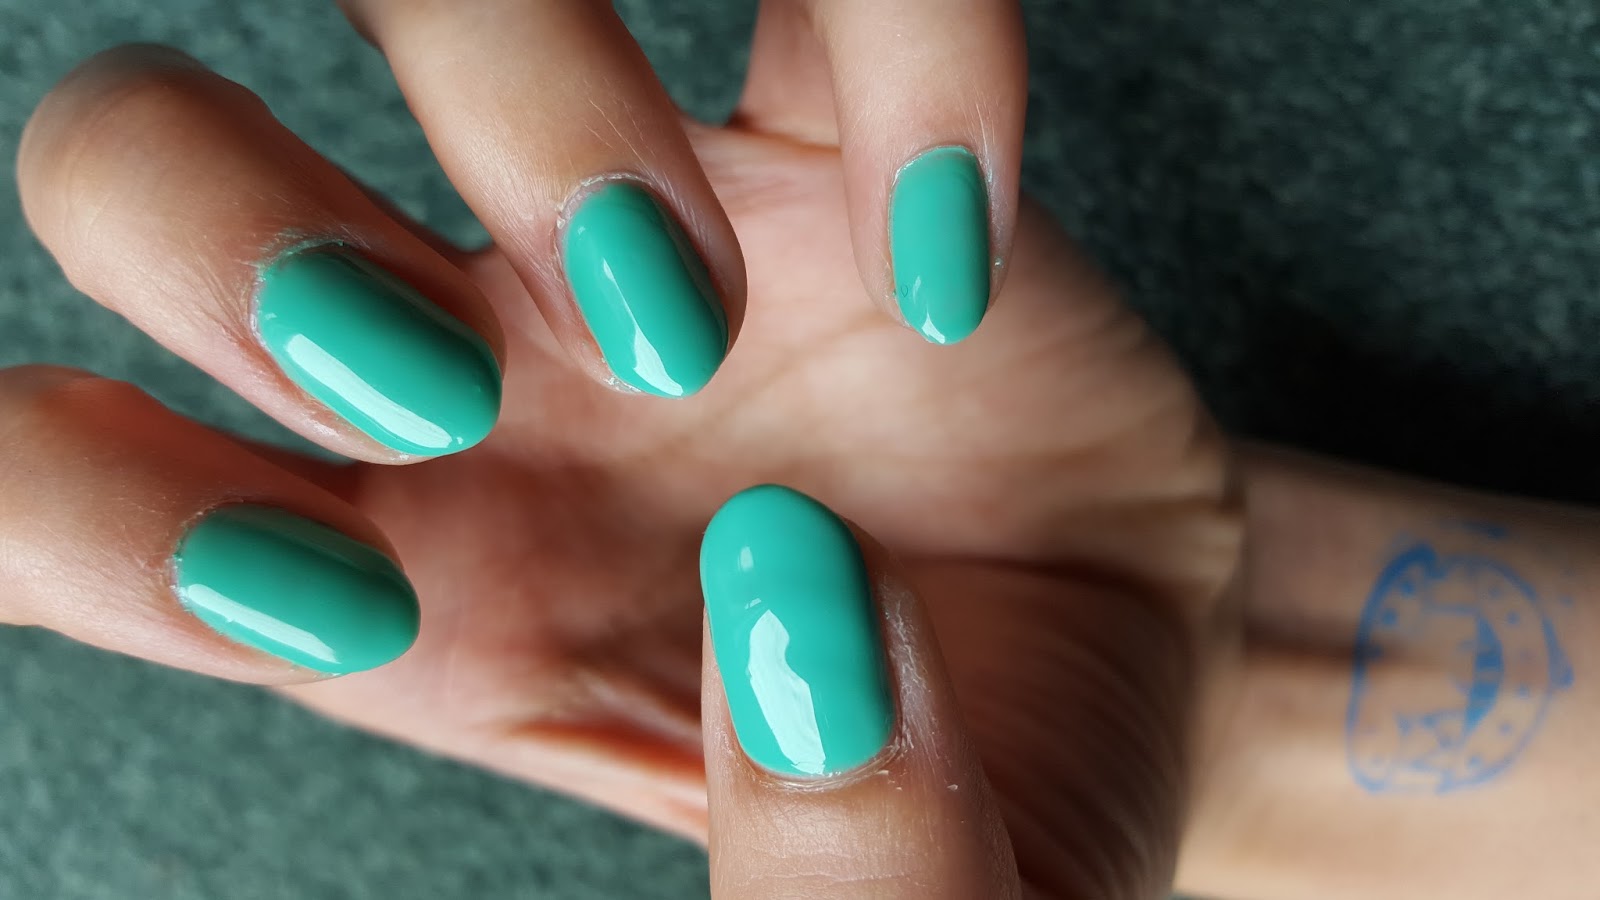
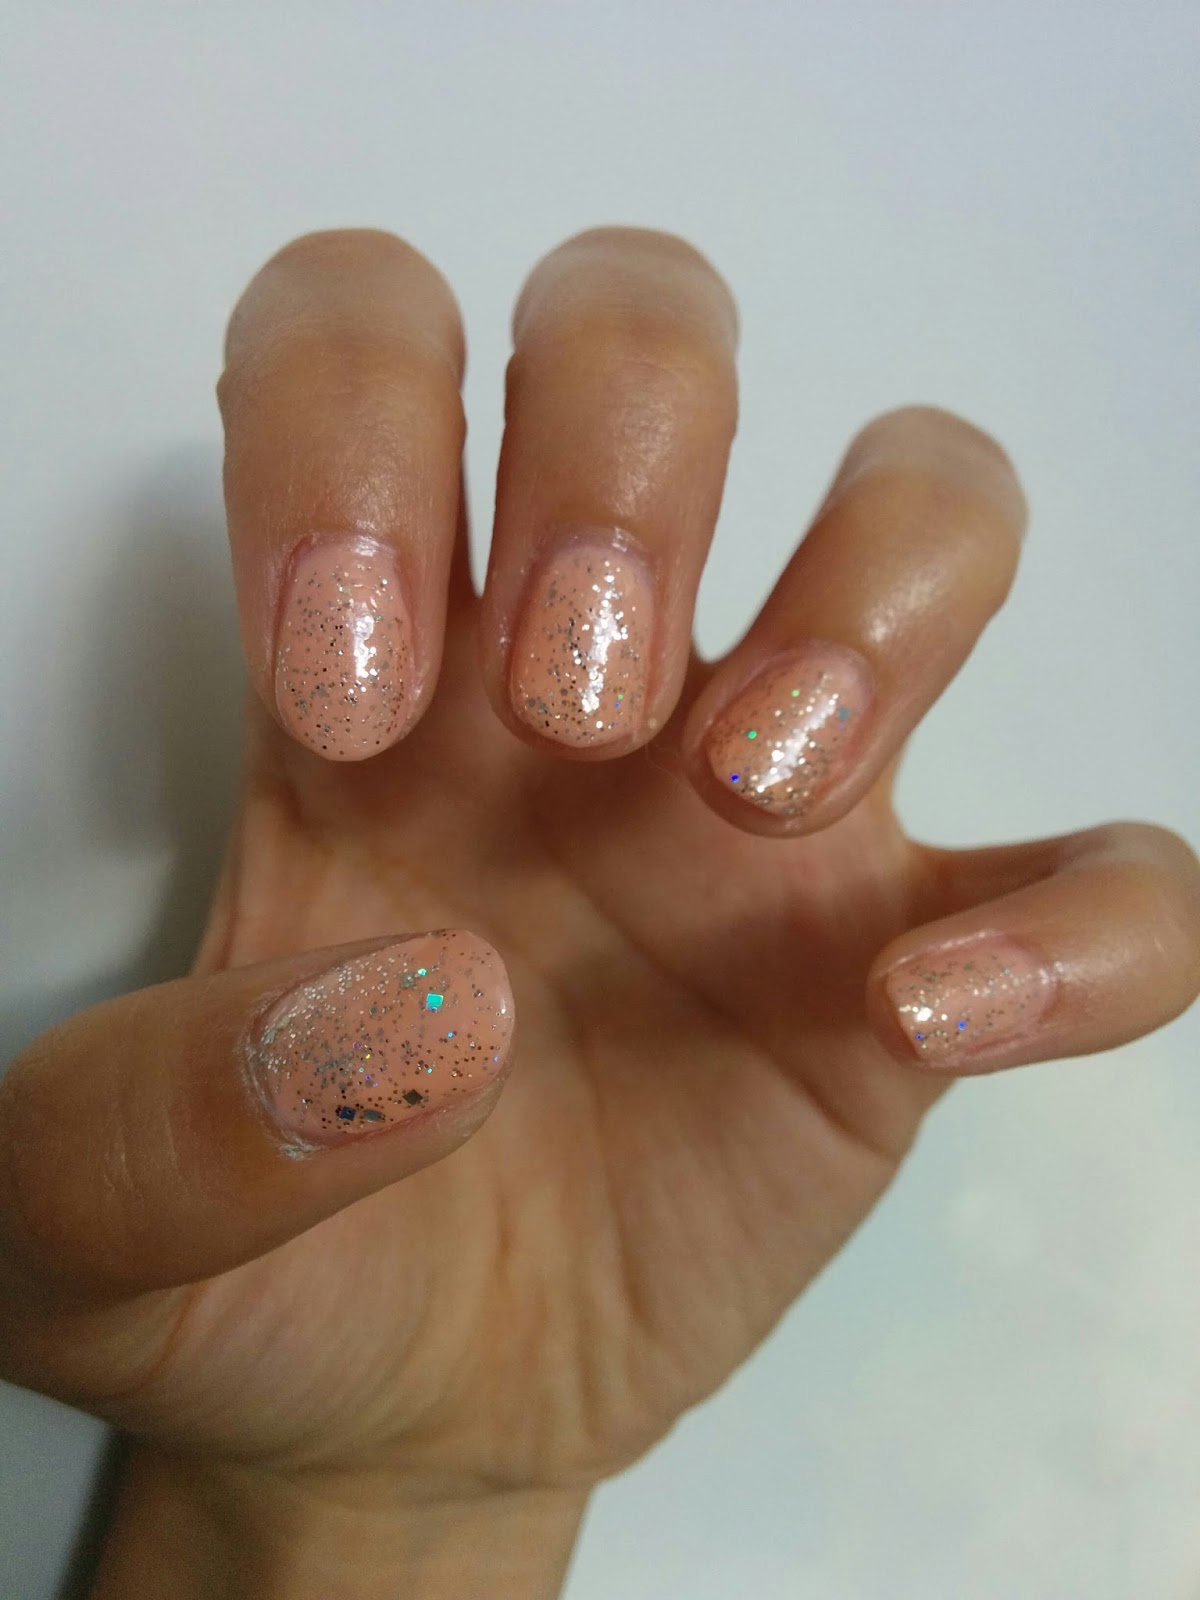
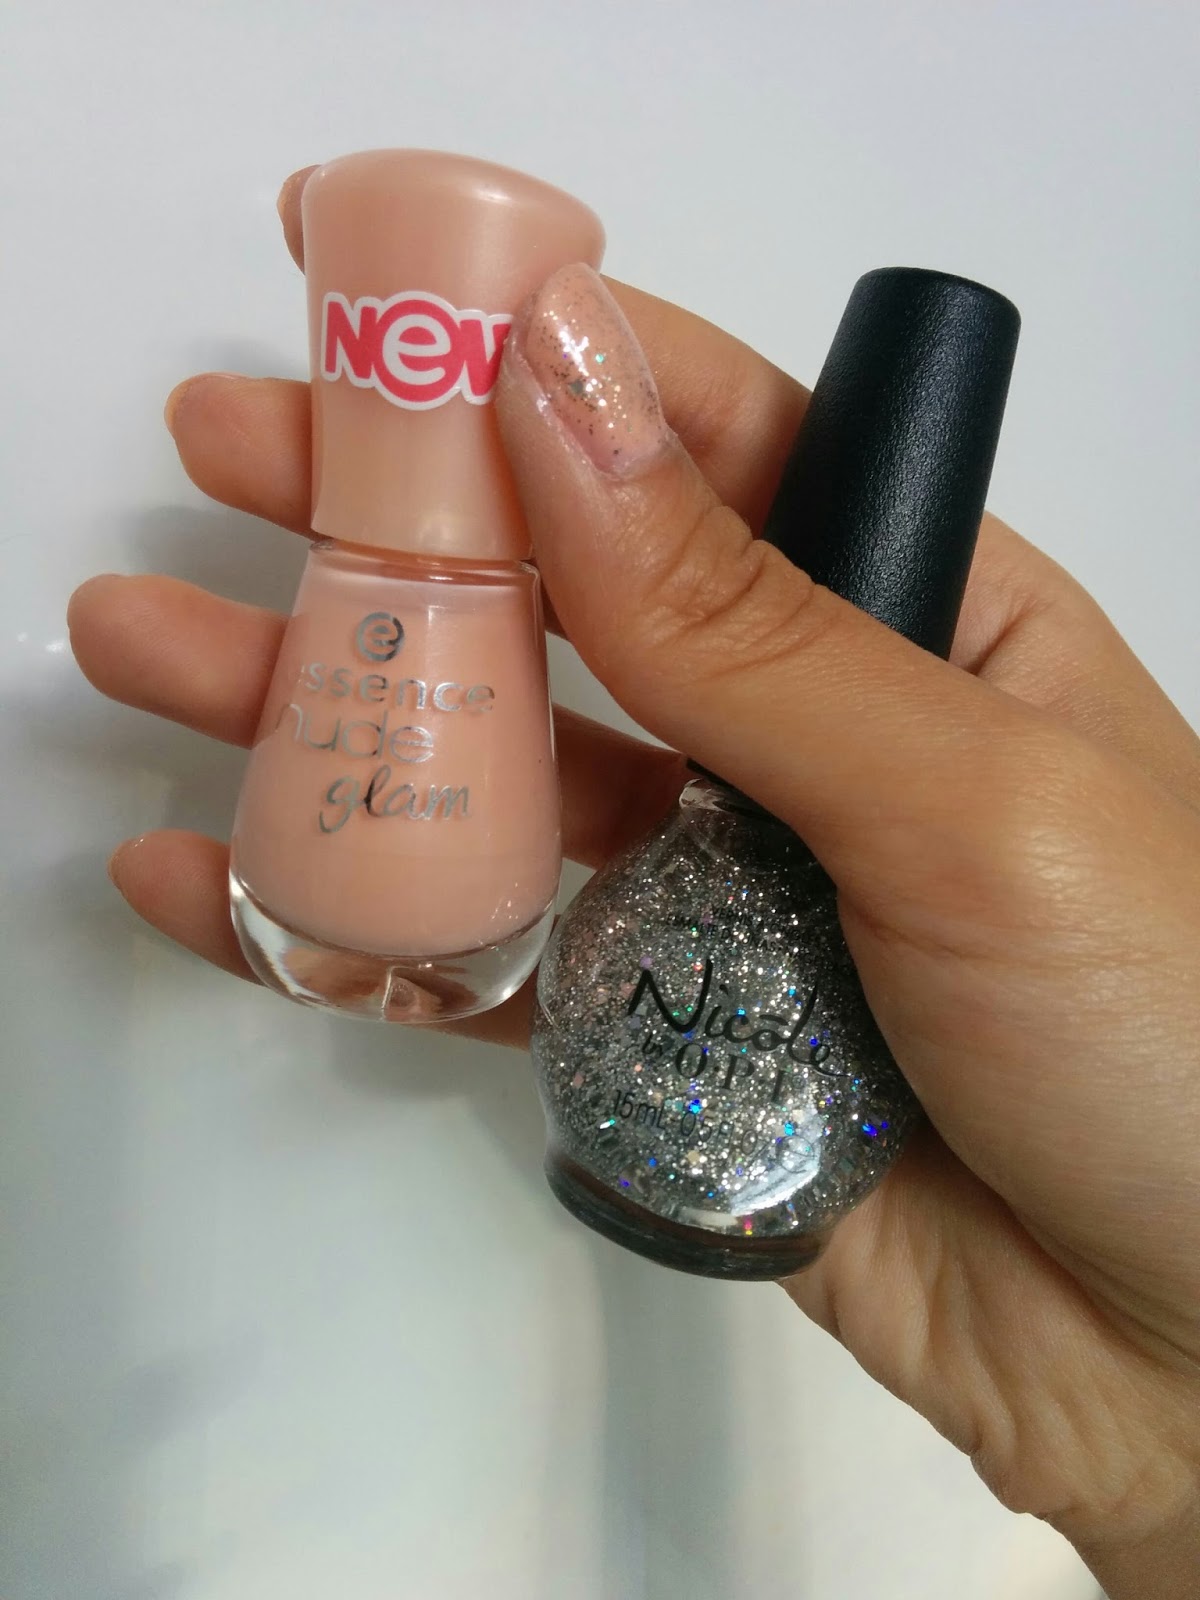
So first I’ll start off with the application. This might sounds really dumb to some people, but I had NO idea that a gel manicure application included UV lamps. I just couldn’t help like feeling that my hands were slowly dying under mini tanning beds. The procedure didn’t take long, and I was happy with the result. The top image is of the fresh manicure (you can spot my IMATS stamp in the picture too)!

My initial thoughts of the manicure were good. Since starting my new job, I had not had any time to do my nails at all. The colour was vibrant and shiny. One thing I did notice was that the gel felt thick. I have no other way to describe it other than I ‘felt’ the polish on my nails.

So let me start by saying I wore this manicure for WAY longer than I should of. I think when I took this polish off, it was over a month and a half old. There was significant growth from my nails and it looked kinda funny. But I feel like I’ve had no time and I knew you couldn’t remove gel with regular nail polish remover.

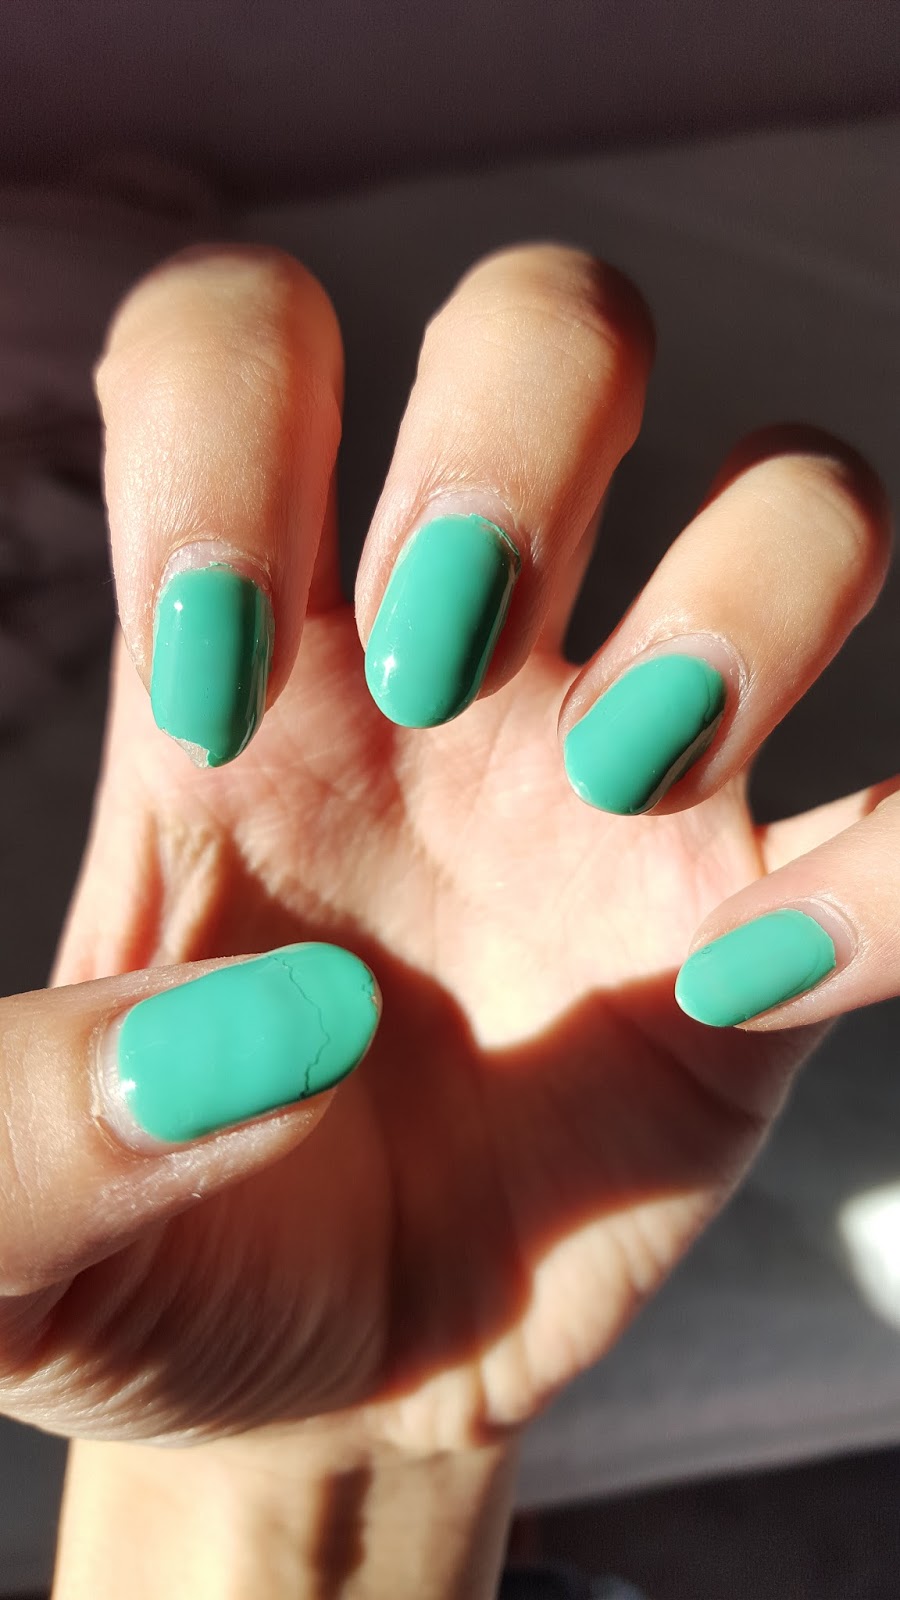
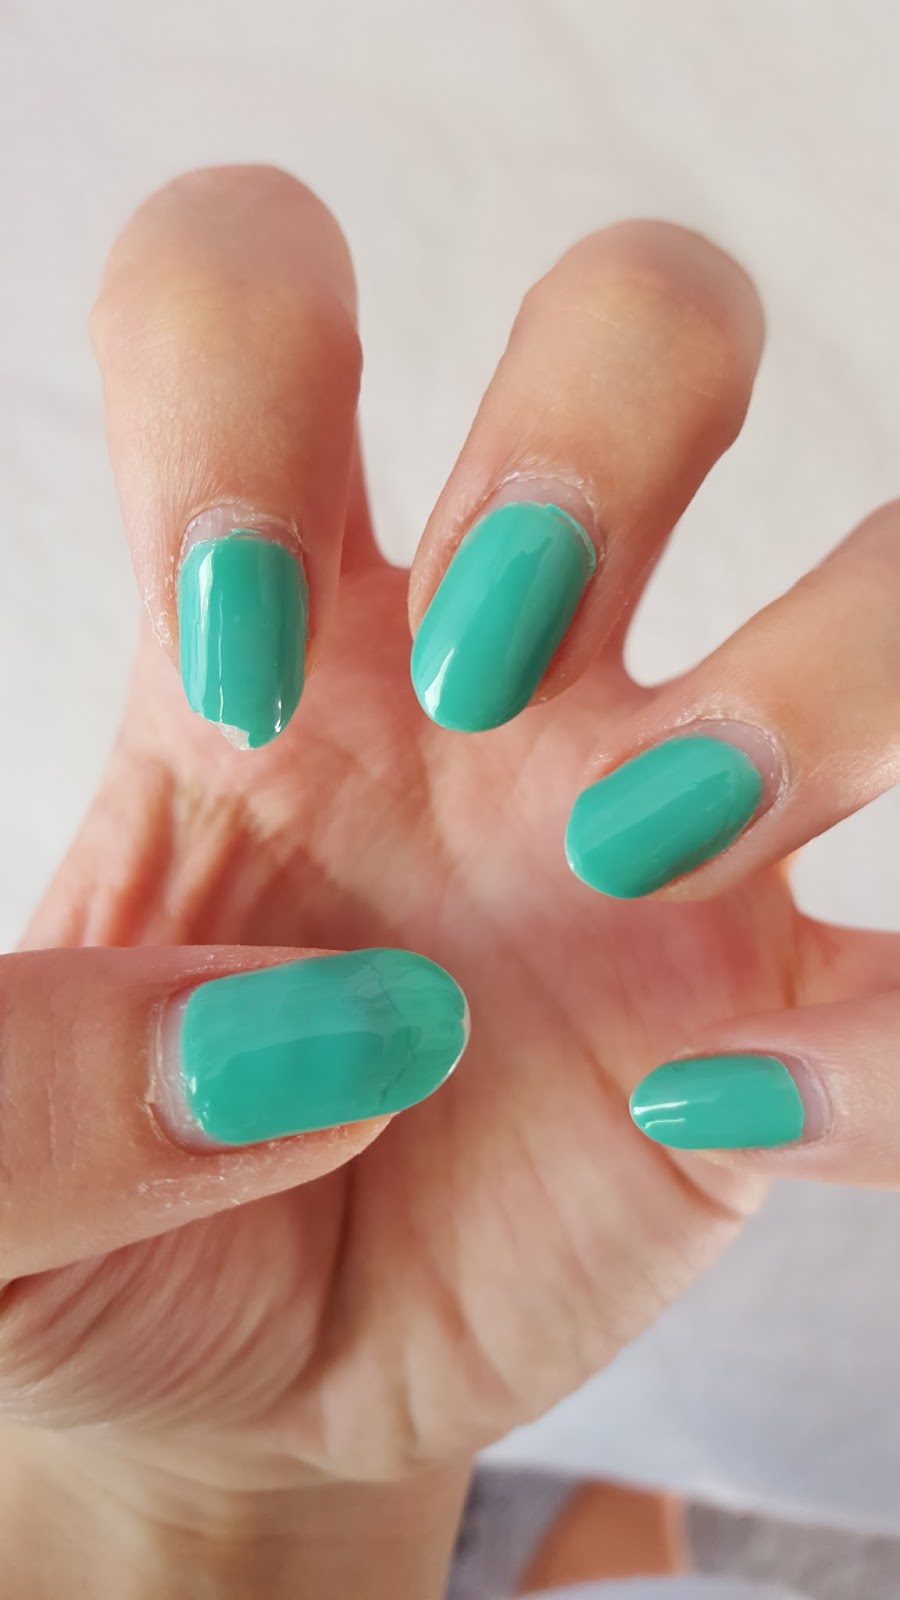
In the pictures above, they were taken at about the 3 week mark. I would say there was minimal chipping and colour fade. There is that little knick on my pointer finger and if you look closely at the first picture, the top gel layer was peeling off of my thumb.

So now let’s get to removal. I don’t think I can put this any other way other than it was a nightmare. I know you’re technically supposed to get it professionally removed so maybe that was my fault, but ain’t nobody got time (or money) for that. So I DIYed it (sort of) and got a Sally Hansen gel acetone remover from Shoppers.

The instructions on the remover were similar to remove glitter polish, soak a cotton pad and wrap with aluminum foil. So I did what the instructions said, but the removal was a very painful process. I left the cotton pad on for about 10 minutes and nothing. The remover packaging pretty much said just continue to soak if the polish doesn’t come off easily, but it was midnight and I had to wake up at 5am the next day so nah. For most of my nails I ended up having to scrape most of polish off with a cuticle pusher (eek!).

So all in all, I don’t think gel is for me. I’m not saying never because it did last a CRAZY long time, I just don’t think the removal process is something I can get behind. Of course I don’t blame the brands that I used (polish and remover) just because I honestly think it was mostly user error for the mistakes I encounters. ;P

Anyways, thanks for reading! Hope you have a great day!

Continue Reading

#NailsOfTheDay: Part Time Ballerina

*Gift and Purchased

I can never get over my claw hands. How awkward. I always like to show my full hand though, so there’s that. Meh.

Anyhoo, here’s what I have on my nails right now. I got the Essence nail polish from the CBB de-stash / meetup and wanted to try it out. After putting it on though, I thought it needed something more. Glitter seemed appropriate for this situation so I slapped it on. I always kind of cringe putting on glitter though because it’s such a hassle to take off.

Essence Nude Glam in Peach and Cream – Nicole by OPI in Guys and Galaxies

I’m glad I picked up the Essence polish in the swap just because I don’t really have very many nude baby pinks. Quality wise I would say it’s so-so. It took 3 coats to become opaque, so reasonable enough. I would definitely consider buying more. Especially the new gel ones that are coming out soon-ish! I didn’t add my Seche Vite top coat to this just because the glitter coat is a top coat in itself.

So don’t mind me as I pretend I’m a sparkly ballerina with these nails. Hope you are having a wonderful day! Until next time!

Follow on Bloglovin

Continue Reading

#NailsOfTheDay: Florals that Smell Like Florals

Hello!

Hope you are having a wonderful day.

A couple of days ago I tried out a new nail design. I’ve done this one before, but I decided to use an Anna Sui nail polish for the first time. The funny thing about Anna Sui polish is that it’s SCENTED! Haha I feel like this is such a throwback to middle school nail polishes. The Anna Sui one is a bit more sophisticated smelling like roses.

In this picture all the colours came out a bit more vibrant than in real life. I would say that the base blue (the Anna Sui polish) is a very close dupe for Essie’s Mint Candy Apple for comparisson.

The polishes and tools used were:

We have:

China Glaze- 949 Starboard
Deborah Lippmann- Girls Just Want to Have Fun
Anna Sui- 111
Seche Vite Top Coat

I also used an Essence dotting tool to create the leaves and flowers.

This is such an easy look to do, you could also do it with a toothpick. I just essentially put random dots to create a flower-like shape and then overlap with green dots for leaves.

A quickie review of the Anna Sui polish. I found at first the rose scent was a bit much. I noticed that once it had set, the scent was a lot more bearable. I’ve been wearing the look for a few days now and I think the scent is the best right now. If I bring my nails close to my nose I get a faint wiff of roses. It took 3 coats to become opaque, but that’s not really unusual for lighter coloured polishes. I also can’t help but think there is a head I can put on the bottle top to create a doll or something!

Hope you are enjoying your day and I appreciate you reading! 🙂

Follow on Bloglovin

Continue Reading